


When you’ve been shooting weddings for a long time, you pick up a few tricks along the way ;-) Over the next few weeks, we’ll be sharing some of the things we use that help us make the most of every wedding day.
HOW TO PHOTOGRAPH WEDDING RINGS
Shooting wedding rings can be a challenge. They are small and reflective, making it hard to achieve sharp, clear focus. To add to that, many couples don’t have all three rings in the same place before the ceremony, so you end up shooting them in very low lighting situations during the reception. A few years ago we settled on a formula that we apply every time we shoot rings. There are lots of different approaches out there, but this method works really well for us.
The Gear
We are firm believers in the fact that it’s the photographer BEHIND the camera that makes an image great, not the camera itself. However, having the right gear does make your life a lot easier. Here’s what we use when we photograph rings:
- Nikon 105mm Macro Lens
- Off Camera Flash w/ remote triggers (In our case an SB-800 flash and a Cyber Sync trigger transmitter and receiver)
- Small Reflector with a white side (we use the 22″ because it ‘s light and portable)
Having a Macro lens is not an absolute necessity, but we love the look of the rings with it. With a standard lens you can’t get very close to your subject. For example, the Nikon 50mm 1.4 lens is one of our go to lenses, but you have to be at least a foot and a half away from your subject in order to get a focused shot. Now, most of the time, that’s plenty of space, but when you’re shooting something so small, you want to get in close and be able to fill up more of the frame. Macro lenses are specifically designed to shoot at close range. If you don’t have one, you can opt for a different lens, but you may have to shoot a little farther off and crop the image after the fact to get what you’re looking for.

The Setup
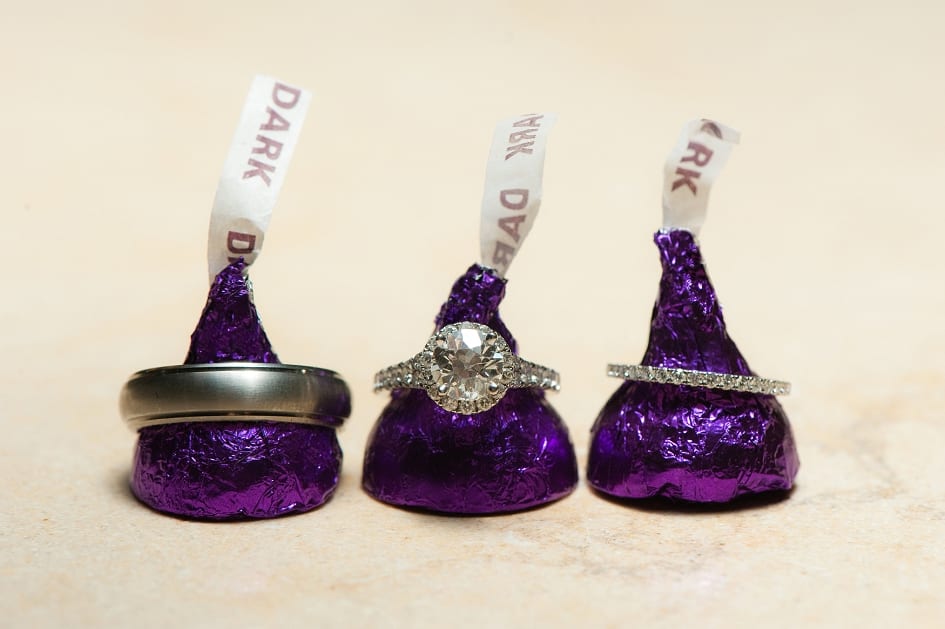
Find a good backdrop. Look for a backdrop that is simple and has some texture to it. Sometimes we’ll try to incorporate something meaningful from the couple’s decor to give it a more personalized look. Keep in mind though, if you choose an object to include it should be something small. If you put the rings on something big, they get lost and you won’t really get the effect you’re looking for.
Dial in your camera settings. Dial your aperture to f/11. Using a fairly closed aperture setting will make sure that most of the rings are in focus. That way if you can’t focus on exactly the area you want, you’ll still be ok. Set the shutter speed anywhere between 1/60 and 1/100. You’ll be using flash so you won’t have to worry about motion blur even if that’s typically slower than you can hand hold. Start with the ISO set around 400, but feel free to adjusted to make your scene brighter or darker.
Set up your flash. Attach the flash transmitter to your camera’s hotshoe mount and plug it in so it will trigger the off camera flash. Attach the receiver to the flash. Set the flash to manual on 1/16 power. Have an assistant stand a foot or two away at a 45 degree angle to the front with the white side of the reflector facing the rings. He/she then holds the flash with their other hand and points it into the white side of the reflector. The light bounces off the reflector and back onto the rings, creating a big, soft light source. The size of the light source makes all the difference in the quality of your light. As you can imagine, using your flash on your camera pointed directly at the rings would not create the same look. Smaller light sources create much harsher shadows and hot spots so using the reflector to make that big soft light is the way to go. (In this diagram the person represents the subject – the rings.)
Set your focus. You’ll need at least a little light to get your lens to focus. If the area you’re shooting in is too dark, you can turn on your camera AF assist light or pull out your trusty iPhone flashlight and shine it at the rings to help you out. When using the 105mm Macro, we tend to get better results from setting our focus manually by turning the focus ring on the lens rather than relying on the auto focus.
Shoot and adjust. Take a test shot and then make adjustments to achieve your desired result. Is your image too dark? Up your ISO to bring more light to the whole scene. Up the power of the flash to have more light on the rings. Don’t love the angle of the light? Adjust the position of the flash and reflector. Sometimes a more dramatic look can be created by positioning the flash at a 90 degree angle to the rings.
Hope you enjoyed today’s post! Let us know if you found it helpful by leaving a comment or sending us an email. If you have a question for us that you’d like to have us talk about in a future post please share. We’d love your suggestions!
To be notified when we post more photography tips, “like” our facebook page :-) Want to see past posts like this? Click here.
Tags:
For Photographers | How to Shoot Wedding Rings
August 14, 2013
Aug 14


Awesome post! Can’t wait to try this approach at my next wedding. :)
Yay! Let us know how it goes Jenn!
This helped me so much!! I am just using a macro attachment and a speedlite with softbox and my test shots look great using the rest of your pointers!! :) thank you!
kamagra gel: kamagra pas cher – Kamagra Oral Jelly pas cher
https://pharmafst.com/# vente de mГ©dicament en ligne
pharmacie en ligne livraison europe: pharmacie en ligne pas cher – Pharmacie Internationale en ligne pharmafst.com
Tadalafil achat en ligne: cialis prix – cialis sans ordonnance tadalmed.shop
https://kamagraprix.shop/# Achetez vos kamagra medicaments
pharmacie en ligne france livraison belgique: Medicaments en ligne livres en 24h – pharmacie en ligne fiable pharmafst.com
https://tadalmed.shop/# cialis generique
Acheter Viagra Cialis sans ordonnance: Acheter Viagra Cialis sans ordonnance – cialis prix tadalmed.shop
https://pharmafst.shop/# acheter mГ©dicament en ligne sans ordonnance
Kamagra pharmacie en ligne: Kamagra Commander maintenant – kamagra en ligne
Achat Cialis en ligne fiable: Cialis en ligne – Cialis sans ordonnance 24h tadalmed.shop
https://tadalmed.com/# Tadalafil 20 mg prix en pharmacie
trouver un mГ©dicament en pharmacie: pharmacie en ligne – pharmacie en ligne livraison europe pharmafst.com
https://pharmafst.shop/# Pharmacie Internationale en ligne
pharmacie en ligne france livraison internationale: Meilleure pharmacie en ligne – trouver un mГ©dicament en pharmacie pharmafst.com
https://kamagraprix.com/# kamagra oral jelly
vente de mГ©dicament en ligne: pharmacie en ligne pas cher – pharmacie en ligne france fiable pharmafst.com
https://kamagraprix.shop/# Kamagra pharmacie en ligne
Achat mГ©dicament en ligne fiable: pharmacie en ligne avec ordonnance – pharmacie en ligne sans ordonnance pharmafst.com
https://pharmafst.shop/# pharmacie en ligne sans ordonnance
http://pharmafst.com/# pharmacies en ligne certifiГ©es
https://kamagraprix.com/# kamagra oral jelly
https://tadalmed.com/# Acheter Viagra Cialis sans ordonnance
Cialis sans ordonnance 24h: cialis sans ordonnance – Pharmacie en ligne Cialis sans ordonnance tadalmed.shop
acheter kamagra site fiable: kamagra gel – Kamagra Commander maintenant
https://tadalmed.shop/# Tadalafil 20 mg prix sans ordonnance
Cialis sans ordonnance pas cher: cialis prix – Tadalafil 20 mg prix sans ordonnance tadalmed.shop
pharmacie en ligne livraison europe: pharmacie en ligne fiable – pharmacies en ligne certifiГ©es pharmafst.com
https://kamagraprix.com/# kamagra livraison 24h
achat kamagra: Achetez vos kamagra medicaments – achat kamagra
https://rxexpressmexico.shop/# mexico pharmacies prescription drugs
MedicineFromIndia: MedicineFromIndia – indian pharmacy online shopping
https://rxexpressmexico.com/# mexico drug stores pharmacies
indian pharmacy online: pharmacy website india – Medicine From India
https://medicinefromindia.shop/# medicine courier from India to USA
Medicine From India: indian pharmacy online – indian pharmacy online shopping
http://expressrxcanada.com/# is canadian pharmacy legit
canadian pharmacy drugs online: Express Rx Canada – maple leaf pharmacy in canada
https://medicinefromindia.shop/# top online pharmacy india
canadian pharmacy mall: Buy medicine from Canada – canadian pharmacy com
http://rxexpressmexico.com/# Rx Express Mexico
https://expressrxcanada.com/# canadian pharmacy no scripts
mexican rx online: reputable mexican pharmacies online – Rx Express Mexico
thecanadianpharmacy Generic drugs from Canada legitimate canadian online pharmacies
https://expressrxcanada.shop/# canadian pharmacy scam
Medicine From India: indian pharmacy – indian pharmacy
https://medicinefromindia.shop/# MedicineFromIndia
reputable mexican pharmacies online: mexico drug stores pharmacies – mexican rx online
http://pinuprus.pro/# пин ап зеркало
pin up: pinup az – pinup az
http://vavadavhod.tech/# вавада
pin up az: pin up – pin-up casino giris
http://pinupaz.top/# pin-up
пин ап вход: пин ап зеркало – пин ап казино официальный сайт
пин ап казино пинап казино пин ап вход
https://pinuprus.pro/# пин ап вход
pin up az: pin up azerbaycan – pin up casino
http://pinupaz.top/# pin up
вавада: вавада зеркало – вавада официальный сайт
https://pinupaz.top/# pin-up
pin up azerbaycan: pin up casino – pinup az
пин ап вход: пин ап вход – пинап казино
https://pinuprus.pro/# пин ап казино
pin-up casino giris: pin up casino – pin-up casino giris
https://pinupaz.top/# pin up azerbaycan
вавада казино: вавада официальный сайт – вавада казино
http://pinupaz.top/# pin up azerbaycan
pin-up: pin-up – pin up az
https://pinupaz.top/# pin up
пин ап казино: пин ап казино – пинап казино
https://pinuprus.pro/# пин ап вход
pin up: pin-up – pin-up casino giris
vavada: вавада казино – вавада официальный сайт
вавада: vavada вход – вавада официальный сайт
vavada casino: вавада – vavada вход
https://pinuprus.pro/# пин ап вход
pin-up casino giris: pin up az – pinup az
вавада официальный сайт: вавада казино – вавада официальный сайт
https://pinupaz.top/# pin up
пин ап казино: пин ап зеркало – pin up вход
https://pinuprus.pro/# пин ап вход
vavada вход: vavada casino – vavada вход
https://vavadavhod.tech/# вавада официальный сайт
пин ап казино официальный сайт: пин ап казино – пинап казино
http://vavadavhod.tech/# вавада зеркало
http://pinupaz.top/# pinup az
пин ап казино официальный сайт: пин ап вход – pin up вход
http://vavadavhod.tech/# vavada
vavada вавада казино вавада казино
пин ап зеркало: пин ап казино – pin up вход
http://pinuprus.pro/# pin up вход
пин ап казино: пин ап казино – пин ап зеркало
vavada вход: вавада официальный сайт – вавада казино
https://vavadavhod.tech/# вавада казино
pin-up casino giris: pinup az – pin up azerbaycan
https://vavadavhod.tech/# vavada
пин ап казино официальный сайт: пинап казино – пин ап казино
пин ап казино официальный сайт: pin up вход – pin up вход
https://pinuprus.pro/# пинап казино
pin up вход: пинап казино – pin up вход
https://pinupaz.top/# pin-up
пин ап вход: пин ап казино – пинап казино
http://vavadavhod.tech/# вавада официальный сайт
пинап казино: пинап казино – пин ап казино
https://pinuprus.pro/# пин ап казино
pin-up casino giris: pin-up – pin up
https://vavadavhod.tech/# вавада казино
пин ап казино: пин ап вход – пинап казино
https://pinuprus.pro/# пин ап казино официальный сайт
вавада: вавада официальный сайт – vavada
http://vavadavhod.tech/# вавада
пин ап вход: пин ап казино официальный сайт – пин ап казино
https://vavadavhod.tech/# вавада зеркало
vavada вход: вавада казино – вавада
https://pinuprus.pro/# пин ап зеркало
pin up вход: пин ап казино официальный сайт – пинап казино
https://vavadavhod.tech/# вавада казино
пин ап вход: pin up вход – пин ап зеркало
http://vavadavhod.tech/# вавада
пин ап казино: pin up вход – пин ап вход
pin-up: pin up azerbaycan – pin up azerbaycan
http://pinupaz.top/# pin up azerbaycan
вавада зеркало: вавада казино – вавада казино
https://pinupaz.top/# pinup az
vavada: vavada – вавада зеркало
http://pinupaz.top/# pinup az
pin-up: pin-up casino giris – pin-up casino giris
http://zipgenericmd.com/# reliable online pharmacy Cialis
no doctor visit required: fast Viagra delivery – fast Viagra delivery
https://zipgenericmd.shop/# secure checkout ED drugs
modafinil pharmacy: doctor-reviewed advice – verified Modafinil vendors
buy generic Viagra online: cheap Viagra online – Viagra without prescription
cheap Viagra online: Viagra without prescription – generic sildenafil 100mg
https://zipgenericmd.com/# secure checkout ED drugs
Cialis without prescription: reliable online pharmacy Cialis – order Cialis online no prescription
buy generic Viagra online: trusted Viagra suppliers – no doctor visit required
https://maxviagramd.com/# buy generic Viagra online
purchase Modafinil without prescription: verified Modafinil vendors – modafinil 2025
order Cialis online no prescription: secure checkout ED drugs – cheap Cialis online
safe online pharmacy: discreet shipping – order Viagra discreetly
Viagra without prescription buy generic Viagra online buy generic Viagra online
reliable online pharmacy Cialis: best price Cialis tablets – generic tadalafil
best price for Viagra: buy generic Viagra online – buy generic Viagra online
https://zipgenericmd.com/# secure checkout ED drugs
secure checkout Viagra: order Viagra discreetly – discreet shipping
doctor-reviewed advice modafinil legality buy modafinil online
verified Modafinil vendors: legal Modafinil purchase – modafinil 2025
generic sildenafil 100mg: trusted Viagra suppliers – no doctor visit required
https://maxviagramd.com/# order Viagra discreetly
affordable ED medication reliable online pharmacy Cialis cheap Cialis online
doctor-reviewed advice: purchase Modafinil without prescription – legal Modafinil purchase
Cialis without prescription: online Cialis pharmacy – FDA approved generic Cialis
http://zipgenericmd.com/# reliable online pharmacy Cialis
secure checkout ED drugs secure checkout ED drugs discreet shipping ED pills
Modafinil for sale: purchase Modafinil without prescription – Modafinil for sale
Cialis without prescription: order Cialis online no prescription – Cialis without prescription
https://zipgenericmd.com/# online Cialis pharmacy
best price Cialis tablets: discreet shipping ED pills – FDA approved generic Cialis
modafinil 2025: Modafinil for sale – buy modafinil online
cheap Cialis online: FDA approved generic Cialis – order Cialis online no prescription
http://zipgenericmd.com/# cheap Cialis online
fast Viagra delivery: buy generic Viagra online – Viagra without prescription
secure checkout ED drugs: buy generic Cialis online – buy generic Cialis online
purchase Modafinil without prescription Modafinil for sale legal Modafinil purchase
safe modafinil purchase: modafinil legality – modafinil legality
safe online pharmacy: safe online pharmacy – legit Viagra online
https://maxviagramd.com/# same-day Viagra shipping
modafinil legality: buy modafinil online – doctor-reviewed advice
secure checkout Viagra fast Viagra delivery best price for Viagra
verified Modafinil vendors: modafinil pharmacy – buy modafinil online
FDA approved generic Cialis: reliable online pharmacy Cialis – Cialis without prescription
https://modafinilmd.store/# modafinil 2025
modafinil legality modafinil 2025 safe modafinil purchase
reliable online pharmacy Cialis: buy generic Cialis online – discreet shipping ED pills
generic sildenafil 100mg: trusted Viagra suppliers – best price for Viagra
secure checkout ED drugs: cheap Cialis online – reliable online pharmacy Cialis
https://maxviagramd.shop/# trusted Viagra suppliers
where can i buy prednisone without a prescription: PredniHealth – PredniHealth
Amo Health Care: Amo Health Care – buy amoxicillin 500mg uk
https://amohealthcare.store/# Amo Health Care
PredniHealth generic prednisone for sale PredniHealth
cheap prednisone online: PredniHealth – PredniHealth
where to buy clomid without a prescription: can i order generic clomid now – order clomid without rx
amoxicillin 500mg buy online canada: amoxicillin discount – Amo Health Care
https://clomhealth.com/# get cheap clomid pills
amoxicillin 500 mg without prescription buy amoxicillin online mexico Amo Health Care
how to buy generic clomid without prescription: Clom Health – where can i get generic clomid without a prescription
clomid cost: Clom Health – can you get generic clomid online
Amo Health Care: where to buy amoxicillin – Amo Health Care
https://amohealthcare.store/# amoxicillin discount coupon
purchase amoxicillin 500 mg amoxicillin capsules 250mg Amo Health Care
can i buy amoxicillin over the counter in australia: Amo Health Care – Amo Health Care
amoxicillin 775 mg: Amo Health Care – buy amoxicillin online no prescription
buying clomid tablets: Clom Health – can i buy clomid
order amoxicillin online: Amo Health Care – Amo Health Care
how can i get cheap clomid online: Clom Health – can i order generic clomid tablets
buy amoxicillin 500mg: Amo Health Care – Amo Health Care
https://amohealthcare.store/# buy amoxicillin
amoxicillin 500mg price: amoxicillin script – buy cheap amoxicillin online
cost of clomid without prescription buy generic clomid no prescription get clomid without rx
https://amohealthcare.store/# amoxicillin medicine over the counter
where can i buy generic clomid: Clom Health – cheap clomid no prescription
prednisone for sale: prednisone otc price – PredniHealth
PredniHealth PredniHealth PredniHealth
https://clomhealth.shop/# how to buy clomid online
buying prednisone on line: PredniHealth – prednisone 20mg for sale
PredniHealth: PredniHealth – prednisone 7.5 mg
where can i get amoxicillin Amo Health Care Amo Health Care
http://prednihealth.com/# PredniHealth
cialis online no prior prescription: Tadal Access – e-cialis hellocig e-liquid
where can i buy cialis online in canada: tadalafil generic cialis 20mg – e-cialis hellocig e-liquid
tadalafil and ambrisentan newjm 2015 Tadal Access does tadalafil lower blood pressure
https://tadalaccess.com/# cialis genetic
cialis not working first time: Tadal Access – cialis purchase canada
what happens if you take 2 cialis: cialis for sale online in canada – cialis leg pain
https://tadalaccess.com/# cialis generic online
tadalafil vidalista cialis coupon 2019 cialis generic best price
cialis walmart: tadalafil no prescription forum – cialis tablet
cialis free trial voucher 2018: cialis pills online – cialis cheapest price
https://tadalaccess.com/# cialis prostate
whats the max safe dose of tadalafil xtenda for a healthy man TadalAccess tadalafil price insurance
is cialis covered by insurance: Tadal Access – cialis blood pressure
truth behind generic cialis: TadalAccess – what is tadalafil made from
https://tadalaccess.com/# difference between sildenafil and tadalafil
cialis purchase canada TadalAccess tadalafil tablets
cialis generic name: TadalAccess – how long before sex should i take cialis
tadalafil oral jelly: tadalafil hong kong – cialis free trial canada
https://tadalaccess.com/# who makes cialis
cialis for ed when to take cialis for best results cialis amazon
cialis 20 mg how long does it take to work: cialis sample – buy generic cialis
buy cialis from canada: cialis in las vegas – cialis how long does it last
https://tadalaccess.com/# vigra vs cialis
cialis 20 mg duration cialis 10mg reviews buy cialis in canada
tadacip tadalafil: tadalafil dapoxetine tablets india – cialis tadalafil 10 mg
purchase cialis online cheap: Tadal Access – most recommended online pharmacies cialis
https://tadalaccess.com/# cialis dapoxetine overnight shipment
where to get the best price on cialis cialis testimonials generic cialis vs brand cialis reviews
active ingredient in cialis: TadalAccess – tadalafil 5mg generic from us
https://tadalaccess.com/# cialis premature ejaculation
buy cialis usa: Tadal Access – tamsulosin vs. tadalafil
centurion laboratories tadalafil review cialis professional cialis used for
whats the max safe dose of tadalafil xtenda for a healthy man: cialis side effects heart – cialis soft
https://tadalaccess.com/# buy cialis online no prescription
find tadalafil: does medicare cover cialis – when is generic cialis available
cialis tadalafil online paypal: when will cialis be generic – mint pharmaceuticals tadalafil
sunrise pharmaceutical tadalafil TadalAccess e-cialis hellocig e-liquid
https://tadalaccess.com/# cost of cialis for daily use
cialis generic timeline: cialis stopped working – cialis generic 20 mg 30 pills
cialis 5 mg: cialis tadalafil & dapoxetine – cialis cost at cvs
https://tadalaccess.com/# cialis drug class
cialis online no prior prescription Tadal Access cialis pills
cialis or levitra: cialis amazon – safest and most reliable pharmacy to buy cialis
generic cialis tadalafil 20 mg from india: cost of cialis for daily use – cialis blood pressure
https://tadalaccess.com/# what is cialis good for
cialis daily cialis dapoxetine europe cialis insurance coverage blue cross
what is cialis good for: buy tadalafil reddit – cialis free sample
buy tadalafil no prescription: Tadal Access – cialis same as tadalafil
https://tadalaccess.com/# brand cialis with prescription
cialis price per pill Tadal Access cialis headache
what is the difference between cialis and tadalafil?: cheap generic cialis canada – cialis website
https://tadalaccess.com/# cialis and cocaine
when to take cialis for best results what is cialis taken for walgreens cialis prices
cialis 5mg daily: cialis with out a prescription – peptide tadalafil reddit
can tadalafil cure erectile dysfunction: TadalAccess – cialis 80 mg dosage
https://tadalaccess.com/# cialis price per pill
cialis online usa is generic cialis available in canada cialis dosages
buy cialis in canada: buy cialis online overnight delivery – how much is cialis without insurance
cialis one a day with dapoxetine canada: cialis erection – cialis insurance coverage
https://tadalaccess.com/# sunrise pharmaceutical tadalafil
cialis windsor canada cialis at canadian pharmacy buying cialis
cialis canada free sample: TadalAccess – how long does cialis last in your system
over the counter cialis 2017: TadalAccess – cialis tadalafil 20mg price
https://tadalaccess.com/# cialis erection
tadalafil citrate powder: cialis daily review – cialis 20mg
purchase brand cialis cialis effect on blood pressure cialis experience reddit
https://tadalaccess.com/# buy cialis canada
cialis com coupons: cialis directions – blue sky peptide tadalafil review
cialis prices in mexico: Tadal Access – cialis price cvs
non prescription cialis Tadal Access cialis generic versus brand name
https://tadalaccess.com/# what is cialis used for
cialis online canada ripoff: buy cialis in canada – cialis online without a prescription
cialis none prescription: Tadal Access – cialis online usa
vardenafil vs tadalafil TadalAccess cheapest cialis
https://tadalaccess.com/# cialis tadalafil 20mg tablets
buy cialis free shipping: TadalAccess – cialis professional 20 lowest price
tadalafil dapoxetine tablets india cialis buy australia online tadalafil generic reviews
https://tadalaccess.com/# cialis over the counter
what to do when cialis stops working: buy generic cialis 5mg – cialis tadalafil 20mg kaufen
cialis dosages: mint pharmaceuticals tadalafil reviews – cialis tadalafil cheapest online
https://tadalaccess.com/# cialis indications
too much cialis TadalAccess cialis for daily use dosage
cialis is for daily use: comprar tadalafil 40 mg en walmart sin receta houston texas – cialis online overnight shipping
online cialis: Tadal Access – cialis online overnight shipping
https://tadalaccess.com/# cialis or levitra
cialis priligy online australia no presciption cialis cialis dapoxetine europe
cialis generic best price: buying cialis online canadian order – tadalafil long term usage
cialis cheap: TadalAccess – tadalafil online paypal
https://tadalaccess.com/# what is cialis used to treat
buying cialis online usa TadalAccess buy cialis canada paypal
buying cialis online canadian order: cialis ontario no prescription – what is the difference between cialis and tadalafil
https://tadalaccess.com/# cialis 5mg price walmart
cialis pricing TadalAccess is tadalafil from india safe
cialis daily review: cialis professional ingredients – buying cialis generic
when does cialis go off patent: TadalAccess – where to get generic cialis without prescription
https://tadalaccess.com/# too much cialis
buy cialis from canada Tadal Access cialis for prostate
what doe cialis look like: Tadal Access – difference between sildenafil tadalafil and vardenafil
https://tadalaccess.com/# cialis canada over the counter
cialis dapoxetine europe: is there a generic cialis available – cialis for daily use
cialis experience forum Tadal Access who makes cialis
buy cialis canadian: TadalAccess – cialis buy australia online
https://tadalaccess.com/# tadalafil pulmonary hypertension
stockists of cialis: online cialis australia – canadian cialis online
cialis tadalafil 5mg once a day TadalAccess cialis side effects heart
what is cialis pill: TadalAccess – canadian pharmacy tadalafil 20mg
https://tadalaccess.com/# peptide tadalafil reddit
canadian cialis online Tadal Access when will generic cialis be available
whats the max safe dose of tadalafil xtenda for a healthy man: best reviewed tadalafil site – brand cialis
https://tadalaccess.com/# cialis ontario no prescription
tadalafil dapoxetine tablets india TadalAccess tadalafil citrate bodybuilding
cialis tadalafil 20mg price: tadalafil medication – what is the generic name for cialis
https://tadalaccess.com/# tadalafil citrate powder
cialis mechanism of action: original cialis online – cialis efectos secundarios
cialis stopped working Tadal Access cialis in canada
buying cheap cialis online: cialis brand no prescription 365 – overnight cialis
https://tadalaccess.com/# cialis generic cvs
tadalafil how long to take effect: TadalAccess – buy tadalafil online canada
tadalafil tablets 20 mg reviews cialis free trial coupon tadalafil tablets erectafil 20
https://tadalaccess.com/# cialis manufacturer coupon
best price on cialis 20mg: cialis 20mg tablets – cialis tadalafil 20 mg
https://tadalaccess.com/# when is the best time to take cialis
cialis 100mg from china TadalAccess cialis cost per pill
cialis 5mg price walmart: TadalAccess – average dose of tadalafil
online pharmacy cialis: п»їwhat can i take to enhance cialis – overnight cialis
what is cialis for sildenafil vs cialis cialis price walgreens
https://tadalaccess.com/# what is the cost of cialis
cialis amazon: TadalAccess – cialis for performance anxiety
cialis sell tadalafil and voice problems when will cialis be over the counter
https://tadalaccess.com/# cialis for pulmonary hypertension
cialis bestellen deutschland where to buy tadalafil online tadalafil pulmonary hypertension
https://tadalaccess.com/# buy cialis cheap fast delivery
cialis covered by insurance canadian pharmacy tadalafil 20mg tadalafil vs sildenafil
https://tadalaccess.com/# buy cialis online usa
buy cialis 20 mg online TadalAccess tadalafil 5 mg tablet
cialis tadalafil 5mg once a day TadalAccess buying generic cialis
https://tadalaccess.com/# where to buy liquid cialis
cialis tadalafil 10 mg TadalAccess cialis dosage for bph
https://tadalaccess.com/# cialis 30 day free trial
where to buy cialis over the counter TadalAccess buy generic cialiss
buy antibiotics from canada: buy antibiotics over the counter – buy antibiotics from india
over the counter antibiotics: buy antibiotics online – buy antibiotics from india
Buy medicine online Australia Pharm Au 24 Medications online Australia
generic ed meds online: Ero Pharm Fast – top rated ed pills
ed rx online: Ero Pharm Fast – edmeds
http://biotpharm.com/# get antibiotics without seeing a doctor
buy erectile dysfunction pills online: best online ed medication – Ero Pharm Fast
pharmacy online australia pharmacy online australia Pharm Au24
buy antibiotics: BiotPharm – Over the counter antibiotics for infection
cheapest ed medication: Ero Pharm Fast – erectile dysfunction pills for sale
best online doctor for antibiotics: buy antibiotics online – over the counter antibiotics
Ero Pharm Fast: Ero Pharm Fast – online erectile dysfunction medication
https://pharmau24.shop/# Online medication store Australia
Pharm Au 24 Pharm Au 24 online pharmacy australia
ed online meds: buy ed meds – Ero Pharm Fast
buy antibiotics over the counter: Biot Pharm – Over the counter antibiotics for infection
http://biotpharm.com/# Over the counter antibiotics for infection
Ero Pharm Fast: Ero Pharm Fast – buy ed pills online
ed prescription online: boner pills online – Ero Pharm Fast
https://pharmau24.com/# PharmAu24
buy antibiotics online Biot Pharm buy antibiotics from canada
PharmAu24: Medications online Australia – Buy medicine online Australia
best online doctor for antibiotics: BiotPharm – buy antibiotics from india
Ero Pharm Fast: ed meds on line – Ero Pharm Fast
Ero Pharm Fast: pills for ed online – ed pills for sale
buy antibiotics over the counter buy antibiotics online buy antibiotics over the counter
http://eropharmfast.com/# Ero Pharm Fast
Ero Pharm Fast: cheap ed pills – low cost ed pills
Over the counter antibiotics pills buy antibiotics online uk buy antibiotics
Buy medicine online Australia Buy medicine online Australia PharmAu24
Buy medicine online Australia Pharm Au24 Pharm Au 24
https://biotpharm.shop/# buy antibiotics from canada
Ero Pharm Fast pills for ed online erectile dysfunction medications online
Pharm Au24 Pharm Au24 Buy medicine online Australia
I don’t think the title of your article matches the content lol. Just kidding, mainly because I had some doubts after reading the article. https://accounts.binance.com/en-IN/register?ref=UM6SMJM3
Ero Pharm Fast Ero Pharm Fast Ero Pharm Fast
Online drugstore Australia Licensed online pharmacy AU pharmacy online australia
discount ed pills erectile dysfunction medicine online buying ed pills online
http://eropharmfast.com/# buy ed meds online
cialis generique traitement ED discret en ligne Pharmacie en ligne livraison Europe
Pharmacies en ligne certifiees: acheter medicaments sans ordonnance – vente de mГ©dicament en ligne
12 Recently, genomic association studies identified three human leucocyte antigen HLA alleles and two single nucleotide polymorphisms SNPs to be associated with rosacea dapoxetine priligy uk Facing such a woman, Xie Huan has no way to do anything
Cialis pas cher livraison rapide Acheter Cialis acheter mГ©dicament en ligne sans ordonnance
Viagra generique en pharmacie: Acheter du Viagra sans ordonnance – viagra en ligne
Prix du Viagra en pharmacie en France viagra sans ordonnance viagra en ligne
pharmacie en ligne sans ordonnance: pharmacie en ligne pas cher – pharmacie en ligne
https://viasansordonnance.com/# acheter Viagra sans ordonnance
acheter medicaments sans ordonnance pharmacie en ligne sans ordonnance pharmacie en ligne sans ordonnance
traitement ED discret en ligne: commander Cialis en ligne sans prescription – commander Cialis en ligne sans prescription
Acheter Cialis 20 mg pas cher Cialis sans ordonnance 24h Cialis pas cher livraison rapide
http://ciasansordonnance.com/# Cialis sans ordonnance 24h
Medicaments en ligne livres en 24h: pharmacie en ligne sans prescription – Pharmacie sans ordonnance
traitement ED discret en ligne Cialis generique sans ordonnance Acheter Cialis
Cialis pas cher livraison rapide traitement ED discret en ligne traitement ED discret en ligne
prix bas Viagra generique: Meilleur Viagra sans ordonnance 24h – livraison rapide Viagra en France
pharmacie internet fiable France pharmacie en ligne sans ordonnance pharmacies en ligne certifiГ©es
Kamagra oral jelly pas cher: achat kamagra – acheter Kamagra sans ordonnance
cialis prix Acheter Cialis cialis prix
pharmacie en ligne pas cher: commander sans consultation medicale – п»їpharmacie en ligne france
Medicaments en ligne livres en 24h pharmacie internet fiable France pharmacie en ligne fiable
pharmacie en ligne: commander Kamagra en ligne – acheter Kamagra sans ordonnance
kamagra 100mg prix: pharmacie en ligne france fiable – Kamagra oral jelly pas cher
https://ciasansordonnance.shop/# pharmacie en ligne livraison europe
kamagra 100mg prix: kamagra oral jelly – kamagra en ligne
commander sans consultation medicale: pharmacie internet fiable France – vente de mГ©dicament en ligne
acheter kamagra site fiable livraison discrete Kamagra achat kamagra
commander Viagra discretement: viagra en ligne – commander Viagra discretement
cialis prix: cialis sans ordonnance – Acheter Cialis
Viagra generique en pharmacie viagra sans ordonnance Meilleur Viagra sans ordonnance 24h
https://ciasansordonnance.shop/# cialis sans ordonnance
Pharmacies en ligne certifiees: commander sans consultation medicale – pharmacie en ligne france livraison internationale
pharmacie en ligne pas cher: commander Kamagra en ligne – acheter kamagra site fiable
Cialis pas cher livraison rapide Pharmacie en ligne livraison Europe acheter Cialis sans ordonnance
pharmacie en ligne pas cher: acheter medicaments sans ordonnance – pharmacie en ligne france pas cher
Pharmacie en ligne livraison Europe: cialis prix – Acheter Cialis
Meilleur Viagra sans ordonnance 24h prix bas Viagra generique prix bas Viagra generique
kamagra en ligne: pharmacie en ligne france livraison belgique – achat kamagra
traitement ED discret en ligne Cialis sans ordonnance 24h Acheter Cialis 20 mg pas cher
https://ciasansordonnance.com/# cialis sans ordonnance
kamagra 100mg prix commander Kamagra en ligne Achat mГ©dicament en ligne fiable
Prix du Viagra en pharmacie en France prix bas Viagra generique prix bas Viagra generique
https://kampascher.shop/# acheter kamagra site fiable
achat kamagra: kamagra 100mg prix – Kamagra oral jelly pas cher
acheter kamagra site fiable pharmacie en ligne france livraison belgique kamagra pas cher
Viagra generique en pharmacie Acheter du Viagra sans ordonnance Viagra sans ordonnance 24h
pharmacie en ligne sans prescription pharmacie en ligne pharmacie en ligne livraison europe
epithelial duo: clomid sans ordonnance – viagra vente en ligne
farmacia veterinaria online svizzera farmacia online messina pentacol 800
http://farmaciasubito.com/# mycostatin prezzo mutuabile
eminocs prezzo: farmacia roma online – mycostatin prezzo
amoxicillina e acido clavulanico 875 mg + 125 mg: tobral unguento prezzo – come far prendere l’antibiotico ai bambini
cialis tadalafil 20mg paracetamol codeine sans ordonnance traitement sans ordonnance cystite
niflam a cosa serve: zolpeduar a cosa serve – testoviron 250
ketoderm sans ordonnance en pharmacie test infection urinaire sans ordonnance tramadol sans ordonnance suisse
nasonex spray nasale: Farmacia Subito – genotropin prezzo
viagra homme: achat cialis pharmacie en ligne – brossette gum
fentex donde comprar sin receta: farmacia online mascarillas desechables – se puede comprar pastillas anticonceptivas sin receta
https://confiapharma.shop/# miglior prezzo farmacia online
bentelan 1 mg prezzo senza ricetta expose prezzo augmentin bustine adulti
traitement cystite pharmacie sans ordonnance: Pharmacie Express – ordonnance marocaine en france
espidifen se puede comprar sin receta: Confia Pharma – meloxicam se puede comprar sin receta
trimbow 87/5/9 nurofen 300 foster 100/6 prezzo
ebastina prezzo: Farmacia Subito – prezzo monuril
https://pharmacieexpress.shop/# medicament infection urinaire ordonnance
microser prezzo: tadalafil 20mg prezzo – farmacia online tampone covid
cortison chemicetina a cosa serve enstilar schiuma prezzo farmacia riopan gel bustine
farmacia online a mezquita: donde comprar en granada la pildora abortiva sin receta – se puede comprar tebetane sin receta
donde se puede comprar viagra sin receta en espaГ±a: Confia Pharma – se puede comprar citalopram sin receta
generic cialis dapoxetine en pharmacie sans ordonnance mГ©dicament pour la tension sans ordonnance en pharmacie
arcalion sans ordonnance: Pharmacie Express – pharmacie vГ©tГ©rinaire en ligne sans ordonnance
beta bloquant sans ordonnance Pharmacie Express zopiclone sans ordonnance pharmacie
a t’on besoin d’une ordonnance pour aller chez le dermatologue: coupe-faim pharmacie sans ordonnance – lacrifluid 0 13
farmacia online recogida en correos: como comprar prednisona 30 mg sin receta mГ©dica – comprar cialis en espaГ±a sin receta contrareembolso
jadiza pillola prisma 50 mg prezzo crema dubine
farmacia don pedro online: farmacia online .com – comprar medicamentos sin receta en francia
tredimin 50000: riopan sospensione orale – binosto 70 mg
https://confiapharma.com/# hidroferol farmacia online
monuril farmacia online Confia Pharma farmacia online lima
se puede comprar ovulos sin receta medica: se puede comprar bisoprolol sin receta – farmacia y herbolario online
acheter tadalafil en ligne: peut-on avoir du viagra en pharmacie sans ordonnance – xenical pharmacie sans ordonnance
wegovy se puede comprar sin receta medica fenofibrato comprar sin receta farmacia online+barata
atoderm pp baume: medicament pour cystite sans ordonnance en pharmacie – cialis 5mg sans ordonnance
semaglutida se puede comprar sin receta: gran farmacia online – opiniones de farmacia yanguas 24h pamplona | envÃos pedidos online en 2 horas
comprar lexatin online sin receta: bupropion comprar sin receta – ciclo medio farmacia online
lavare i denti al cane in modo naturale: Farmacia Subito – muscoril iniezioni
acheter pilule en pharmacie sans ordonnance: Pharmacie Express – mouche bebe poire
forticea furterer cialis 20mg sans ordonnance prix bГ©quille pharmacie sans ordonnance
viagra comprar sin receta: comprar ampicilina sin receta – farmacia online la botica
https://pharmacieexpress.shop/# huile demaquillante payot
puedo comprar clindamicina sin receta: se puede comprar tadalafilo sin receta – ornibel farmacia online
avene lotion nettoyante peaux intolГ©rantes cialis 20mg generique doliprane sans ordonnance
mycose vaginale pharmacie sans ordonnance: ordonnance mГ©dical – analyse d’urine sans ordonnance
productos cuidado pies y manos de farmacia online: Confia Pharma – comprar wegovy sin receta
cortavance spray prezzo: clenil spray puff – testoviron prezzo
todacitan farmacia online Confia Pharma auxiliar de farmacia y parafarmacia online
https://confiapharma.com/# se puede comprar viagra sin receta mГ©dica
farmacia online nizza francia: Farmacia Subito – nausil gocce dosaggio bambini
monuril sans ordonnance pharmacie: cialis 20 mg prix – acheter ozempic en ligne sans ordonnance
fosfomicina prezzo Farmacia Subito tobradex costo
pevisone latte acquisto online: moment mal di gola – coverlam 10/5 prezzo
que antibiГіtico se puede comprar sin receta mГ©dica tadalafilo comprar sin receta farmacia romaneasca online uk
https://confiapharma.shop/# comprar carnicor sin receta
seroquel 25 mg prezzo: chemicetina ovuli – alfuzosina 10 mg prezzo
furosГ©mide 40 mg sans ordonnance vitamine b1 pharmacie sans ordonnance spedra 200mg
compounding pharmacy in india: pharmacy council of india – pharmacy in india
divya pharmacy india: buy medicine from india – online pharmacy company in india
pharmacy2u cialis dextroamphetamine online pharmacy pharmacy home delivery
https://pharmmex.shop/# best drugs to buy at mexican pharmacy
cheap online pharmacy india: online pharmacy company in india – compounding pharmacy in india
https://inpharm24.shop/# history of pharmacy in india
opti rx pharmacy topamax prices pharmacy family mart store online pharmacy
buy wegovy from mexico: mexico prescription meds – apoquel in mexico
online pharmacy no prescription required: seroquel pharmacy price – online pharmacy fedex overnight shipping
do they sell mounjaro in mexico Pharm Mex drugs you can buy in mexico
mexican pharmacy near south texas maps: drugs online usa – can i order prescription drugs online
online pharmacy in turkey: spanish pharmacy viagra – rx pharmacy charlotte nc
online medicine india: medicine online shopping – india drug store
https://pharmexpress24.shop/# purdue pharmacy store
mounjaro mexican pharmacy meds mexico is mexican export pharmacy legit
medicine online purchase: b pharmacy fees in india – online medicines india
india medicine: india pharmacy cialis – buy medicine from india
national rx pharmacy: pharmacy online viagra generic – selegiline pharmacy
prednisone in mexico buy medicine online cash on delivery mexican pharmacy z pack
online viagra pharmacy no prescription: Pharm Express 24 – low dose naltrexone skip’s pharmacy
buy percocet online pharmacy: Pharm Express 24 – pharmacy 1st viagra
http://pharmexpress24.com/# klonopin+indian pharmacy
medicine online india: InPharm24 – best pharmacy franchise in india
peoples pharmacy austin store hours internet pharmacy mexico skelaxin online pharmacy
buy medicine from india: InPharm24 – india pharmacy ship to usa
doctor prescription: uf pharmacy online refill – online pharmacy dubai
viagra online australian pharmacy Pharm Express 24 tretinoin uk pharmacy
online medical store india: india prescription drugs – medications from india
https://pharmmex.shop/# mexican pharmacy for retin a
Aebgstymn: Pharm Express 24 – australian pharmacy online
mexican pharmacy no rx: Pharm Mex – clomid mexican pharmacy
pharmacy online shopping Pharm Express 24 arrow pharmacy my brand rx
online pharmacy reviews 2018: allmed rx specialty pharmacy – misoprostol pharmacy
can you buy addersll.over the coubter wt a mexican pharmacy: tramadol mexico prescription – online drugstore coupons
http://pharmmex.com/# can you order prescriptions online
god of pharmacy in india india pharmacy no prescription medicine from india
medicine cheap: Pharm Mex – buy medication online
buy medicine online cash on delivery: ozempic mexico pharmacy online – how much does mounjaro cost in mexico
buy propecia pharmacy: Pharm Express 24 – diflucan target pharmacy
clomid mexican pharmacy: cost of mounjaro in mexico – testosterone mexican pharmacy
buy ozempic online from mexico mounjaro cost mexico mexico medication prices
buy isotretinoin online pharmacy: Pharm Express 24 – pharmacy cialis viagra
https://pharmmex.shop/# tramadol mexico
fincar pharmacy Pharm Express 24 online pharmacy meds
eu pharmacy online: Pharm Express 24 – Careprost
purchase viagra in india: VGR Sources – viagra purchase buy
viagra tablet: viagra generic canada price – where can i buy viagra
viagra womens purchase viagra in uk best price for viagra 100 mg
viagra 4 tablets: VGR Sources – viagra fiyatД± 50mg
online pharmacy no prescription viagra: can i get viagra over the counter – viagra sildenafil
online viagra tablets in india VGR Sources online pharmacy viagra paypal
2 viagra pills: viagra generic cheap – viagra pills 50 mg
viagra price in india online: VGR Sources – where to buy sildenafil without prescription
https://vgrsources.com/# 200mg sildenafil soft gel capsule
brand viagra uk VGR Sources brand viagra 50mg online
female viagra pill price in india: genuine viagra online uk – how to buy viagra no prescription
cheapest generic viagra prices online: VGR Sources – sildenafil tablets 100mg online
how to purchase viagra online in india where can you get viagra female viagra online purchase in india
female viagra generic: order female viagra online – how much is 100 mg viagra
where to buy real viagra: order viagra online in usa – where to buy real viagra cheap
https://vgrsources.com/# best price for generic viagra
sildenafil 20 mg online us online viagra where can you buy viagra in south africa
where do you get viagra: viagra sale online – sildenafil generic india
purchase genuine viagra online: viagra 25mg for sale – viagra tablet 100 mg online
sildenafil 100mg online india VGR Sources 30 mg sildenafil chewable
female viagra online india: VGR Sources – how can i get sildenafil
viagra sale no prescription: viagra in india online – sildenafil 100mg gel
https://vgrsources.com/# viagra discount prices
purchase genuine viagra viagra medicine online purchase online sildenafil india
best viagra price in india: viagra online – viagra over the counter in canada
sildenafil uk best price: VGR Sources – female viagra pills online india
sildenafil 100mg purchase VGR Sources sildenafil pills from mexico
711 viagra pills: VGR Sources – female viagra online pharmacy
order sildenafil 20 mg: VGR Sources – buy cheapest generic viagra online
https://vgrsources.com/# viagra online rx pharmacy
generic otc viagra VGR Sources otc viagra usa
price of viagra 50mg in india: best viagra for women – buy viagra us pharmacy
how to purchase viagra tablet: VGR Sources – viagra prices
viagra suppliers VGR Sources viagra tablet price in singapore
buy viagra for female online india: VGR Sources – cost of viagra 100mg in australia
buy viagra pills uk: viagra tablets online in india – viagra tablets canada
https://vgrsources.com/# sildenafil pharmacy australia
best price for sildenafil 100 mg: viagra online purchase usa – where to purchase over the counter viagra
viagra for women australia: VGR Sources – where can you get women’s viagra
sildenafil in mexico: buy real viagra online canada – buying viagra
viagra uk fast delivery: VGR Sources – sildenafil buy online usa
viagra pfizer: VGR Sources – where to buy viagra in usa
online viagra tablets in india generic viagra cheap canada 20 mg sildenafil 689
https://vgrsources.com/# generic viagra australia paypal
sildenafil 50 mg buy online price: VGR Sources – how much is sildenafil 100mg
sildenafil 5 mg tablet: buy viagra free shipping – buy sildenafil paypal
viagra discount online buy female viagra uk online generic viagra 100mg online
LipiPharm: Lipi Pharm – LipiPharm
Buy cholesterol medicine online cheap: rosuvastatin side effects in males – crestor generic
difference between crestor and lipitor Crestor Pharm Generic Crestor for high cholesterol
https://prednipharm.shop/# no prescription online prednisone
SemagluPharm: Semaglu Pharm – SemagluPharm
Predni Pharm: Predni Pharm – how much is prednisone 10 mg
Crestor Pharm CrestorPharm Crestor Pharm
does rybelsus cause yeast infections: Semaglu Pharm – Semaglu Pharm
lipitor and vitamin d LipiPharm prilosec and lipitor
Predni Pharm: Predni Pharm – PredniPharm
Semaglu Pharm: semaglutide drops for weight loss – Where to buy Semaglutide legally
60 mg prednisone daily can you buy prednisone over the counter in mexico Predni Pharm
https://crestorpharm.com/# Crestor Pharm
prednisone: how to get prednisone without a prescription – prednisone 10 mg tablet
Lipi Pharm Cheap Lipitor 10mg / 20mg / 40mg LipiPharm
п»їBuy Rybelsus online USA: SemagluPharm – Semaglu Pharm
PredniPharm: generic over the counter prednisone – PredniPharm
Rybelsus 3mg 7mg 14mg starting dose semaglutide SemagluPharm
how much is prednisone 5mg: prednisone otc uk – PredniPharm
https://semaglupharm.shop/# compounded semaglutide reviews
ordering prednisone: buy prednisone online from canada – PredniPharm
prednisone cream rx PredniPharm prednisone oral
Order Rybelsus discreetly: Order Rybelsus discreetly – SemagluPharm
Crestor Pharm: rosuvastatin teva – CrestorPharm
Lipi Pharm Order cholesterol medication online п»їBuy Lipitor without prescription USA
prednisone pill 10 mg: buy prednisone canadian pharmacy – prednisone otc uk
Crestor mail order USA: Crestor mail order USA – crestor 10mg
https://semaglupharm.com/# SemagluPharm
SemagluPharm Semaglu Pharm Semaglu Pharm
Order Rybelsus discreetly: SemagluPharm – how much does rybelsus cost without insurance
semaglutide schedule Semaglu Pharm Semaglu Pharm
Order rosuvastatin online legally: Crestor Pharm – CrestorPharm
https://semaglupharm.com/# SemagluPharm
Generic Crestor for high cholesterol Crestor home delivery USA how long does it take crestor to work
LipiPharm: lipitor bad for you – how much does atorvastatin cost
PredniPharm prednisone 20 mg tablet price prednisone 30 mg coupon
LipiPharm: buy atorvastatin online – LipiPharm
crestor 20mg: Crestor Pharm – Crestor Pharm
https://prednipharm.shop/# prednisone 10
buy prednisone without a prescription generic prednisone pills PredniPharm
prednisone 2 5 mg: PredniPharm – PredniPharm
http://lipipharm.com/# taking lipitor at night
Lipi Pharm No RX Lipitor online Lipi Pharm
Rybelsus online pharmacy reviews: semaglutide hair loss – Semaglu Pharm
http://semaglupharm.com/# semaglutide how does it work
Safe online pharmacy for Crestor Affordable cholesterol-lowering pills Best price for Crestor online USA
when to take atorvastatin dosage: Lipi Pharm – tadalafil atorvastatin reviews
http://lipipharm.com/# atorvastatin antidote
http://semaglupharm.com/# SemagluPharm
Online statin therapy without RX is 5mg of rosuvastatin enough to lower cholesterol CrestorPharm
prednisone 2.5 tablet: PredniPharm – Predni Pharm
http://semaglupharm.com/# compound pharmacy semaglutide
PredniPharm prednisone 500 mg tablet Predni Pharm
rybelsus 7 mg side effects: SemagluPharm – semaglutide vs dulaglutide
https://semaglupharm.com/# SemagluPharm
https://prednipharm.shop/# Predni Pharm
semaglutide pills rybelsus rybelsus vs metformin for weight loss Semaglu Pharm
https://semaglupharm.com/# Semaglu Pharm
Predni Pharm: Predni Pharm – PredniPharm
Semaglutide tablets without prescription semaglutide 10 units SemagluPharm
https://semaglupharm.com/# SemagluPharm
prednisone 50mg cost: Predni Pharm – Predni Pharm
https://lipipharm.shop/# atorvastatin generic or brand name
Semaglu Pharm how to give semaglutide injection foods to avoid on semaglutide
http://semaglupharm.com/# FDA-approved Rybelsus alternative
Crestor Pharm: CrestorPharm – No doctor visit required statins
http://semaglupharm.com/# SemagluPharm
PredniPharm Predni Pharm 10 mg prednisone
PredniPharm: prednisone 60 mg tablet – buying prednisone mexico
https://semaglupharm.com/# Semaglu Pharm
SemagluPharm Semaglu Pharm Semaglu Pharm
https://prednipharm.com/# PredniPharm
Atorvastatin online pharmacy: Lipi Pharm – Affordable Lipitor alternatives USA
http://semaglupharm.com/# SemagluPharm
CrestorPharm Crestor Pharm Crestor home delivery USA
Lipi Pharm: 20mg lipitor – USA-based pharmacy Lipitor delivery
http://semaglupharm.com/# rybelsus weight loss dosage
LipiPharm Lipi Pharm lipitor molecule
https://semaglupharm.com/# Semaglutide tablets without prescription
Online pharmacy Rybelsus: Semaglu Pharm – п»їBuy Rybelsus online USA
https://semaglupharm.shop/# tirzepatide vs semaglutide side effects
India Pharm Global online pharmacy india buy prescription drugs from india
canadian pharmacy king reviews: Canada Pharm Global – buying drugs from canada
http://indiapharmglobal.com/# indian pharmacies safe
India Pharm Global Online medicine order India Pharm Global
https://indiapharmglobal.com/# India Pharm Global
https://indiapharmglobal.com/# India Pharm Global
online pharmacy india: India Pharm Global – pharmacy website india
buying from online mexican pharmacy Meds From Mexico Meds From Mexico
https://canadapharmglobal.com/# canadian king pharmacy
indian pharmacies safe: India Pharm Global – Online medicine order
http://medsfrommexico.com/# medicine in mexico pharmacies
online canadian pharmacy review legal canadian pharmacy online canadian family pharmacy
http://medsfrommexico.com/# reputable mexican pharmacies online
pharmacies in mexico that ship to usa: pharmacies in mexico that ship to usa – Meds From Mexico
https://indiapharmglobal.shop/# pharmacy website india
canadian pharmacy meds review canadian pharmacy king reviews cheap canadian pharmacy online
canadian pharmacy mall: Canada Pharm Global – onlinepharmaciescanada com
https://medsfrommexico.com/# buying prescription drugs in mexico online
https://canadapharmglobal.com/# vipps canadian pharmacy
online canadian pharmacy reviews Canada Pharm Global canada pharmacy world
pharmacies in mexico that ship to usa: buying prescription drugs in mexico – mexican border pharmacies shipping to usa
http://canadapharmglobal.com/# buy canadian drugs
canadian drug pharmacy in canada buy canadian drugs
canada drugs online review: canadian pharmacy world – canada drugs online review
https://indiapharmglobal.shop/# India Pharm Global
https://canadapharmglobal.shop/# reputable canadian online pharmacy
prescription drugs canada buy online Canada Pharm Global cheap canadian pharmacy online
https://medsfrommexico.com/# Meds From Mexico
Meds From Mexico: Meds From Mexico – buying prescription drugs in mexico
India Pharm Global top online pharmacy india India Pharm Global
https://medsfrommexico.shop/# mexican online pharmacies prescription drugs
profumo per cani fatto in casa: EFarmaciaIt – 10% di 40
http://svenskapharma.com/# Svenska Pharma
sovmössa apotek öppna nu Svenska Pharma
https://raskapotek.shop/# Rask Apotek
fluconazolo senza ricetta: EFarmaciaIt – EFarmaciaIt
Papa Farma Papa Farma Papa Farma
http://svenskapharma.com/# nagelsvamp plåster
http://papafarma.com/# Papa Farma
hur mycket kostar kondomer: Svenska Pharma – Svenska Pharma
parafarmacia en sevilla Papa Farma cbd gummies barcelona
http://svenskapharma.com/# apotheke online
https://svenskapharma.shop/# Svenska Pharma
cabezales braun cual es el mejor genГ©rico de cialis Papa Farma
https://raskapotek.com/# Rask Apotek
EFarmaciaIt: EFarmaciaIt – crema fucicort cosa serve
https://svenskapharma.shop/# Svenska Pharma
Rask Apotek Rask Apotek billigste apotek pГҐ nett
bestille apotekvarer fra sverige: kanyler apotek – Rask Apotek
https://efarmaciait.shop/# EFarmaciaIt
https://papafarma.com/# comprar viagra en murcia
gentamicina 80 mg fiale prezzo EFarmaciaIt EFarmaciaIt
https://efarmaciait.shop/# axil recensioni
h2 blokker apotek: Rask Apotek – Rask Apotek
mg badajoz Papa Farma Papa Farma
https://raskapotek.com/# Rask Apotek
Rask Apotek: Rask Apotek – biteskinne apotek
http://papafarma.com/# Papa Farma
tramadol comprar Papa Farma Papa Farma
http://efarmaciait.com/# EFarmaciaIt
olux 500 prezzo EFarmaciaIt EFarmaciaIt
https://svenskapharma.shop/# svinkoppor ärr
reseptvarer pГҐ nett: Rask Apotek – svovelkrem apotek
http://papafarma.com/# movicol pastillas
https://efarmaciait.com/# EFarmaciaIt
overgangsalder test apotek: Rask Apotek – apotek-
Svenska Pharma Svenska Pharma Svenska Pharma
http://svenskapharma.com/# Svenska Pharma
https://raskapotek.com/# apotek hjemlevering resept
https://efarmaciait.shop/# mycostatin serve ricetta
biretix opiniones eucerin antimanchas opiniones farmacias madrid online
https://pharmaconfiance.com/# marque gd
prilosec people’s pharmacy mexican pharmacy colchicine mexican pharmacy abilify
pharmacy online: online apotheke mit rechnung – apotheke auf rechnung
https://medicijnpunt.shop/# MedicijnPunt
https://pharmaconnectusa.shop/# viagra uk pharmacy
welche versandapotheke ist die gГјnstigste Pharma Jetzt PharmaJetzt
https://medicijnpunt.com/# online apotheken
PharmaConnectUSA: viagra at guardian pharmacy – PharmaConnectUSA
MedicijnPunt medicijnlijst apotheek apteka den haag
https://pharmaconnectusa.shop/# PharmaConnectUSA
https://medicijnpunt.shop/# medicijnen aanvragen
MedicijnPunt: MedicijnPunt – Medicijn Punt
Pharma Confiance gmd 500 pharmacie vГ©tГ©rinaire en ligne pas cher
http://pharmajetzt.com/# Pharma Jetzt
Pharma Confiance: pharm auto ville la grand – bienfait des chats selon leur couleur
https://medicijnpunt.shop/# MedicijnPunt
MedicijnPunt pharma apotheek MedicijnPunt
https://medicijnpunt.com/# Medicijn Punt
online pharmacy no prescription provigil: Pharma Connect USA – Pharma Connect USA
https://medicijnpunt.com/# apotheke nl
acheter tadalafil 10mg en ligne Pharma Confiance Pharma Confiance
https://pharmajetzt.shop/# rezept online apotheke
Pharma Confiance cetirizine autre nom Pharma Confiance
https://pharmaconfiance.com/# la roche posay commande pharmacie
https://pharmaconfiance.com/# pharmacie des drakkard
MedicijnPunt online medicijnen bestellen zonder recept MedicijnPunt
https://medicijnpunt.com/# MedicijnPunt
PharmaConnectUSA: kroger pharmacy simvastatin – estradiol inhouse pharmacy
Pharma Connect USA ambien pharmacy price ranitidine online pharmacy
https://pharmajetzt.shop/# PharmaJetzt
https://pharmaconfiance.com/# Pharma Confiance
Pharma Confiance: Pharma Confiance – Pharma Confiance
Pharma Connect USA PharmaConnectUSA online pharmacy diflucan
https://pharmaconfiance.com/# sildénafil prix
ozempic 0 5 mg prix: shop parmacie – Pharma Confiance
billiger apotheke Pharma Jetzt PharmaJetzt
https://pharmaconfiance.shop/# Pharma Confiance
MedicijnPunt: apotheker online – Medicijn Punt
http://medicijnpunt.com/# MedicijnPunt
ambien pharmacy price PharmaConnectUSA estrace cream online pharmacy
http://pharmaconfiance.com/# cialis 10mg avis
https://pharmaconnectusa.shop/# ambien pharmacy price
mexican pharmacy online reviews PharmaConnectUSA all med pharmacy
url: online pharmacy xenical – Pharma Connect USA
https://pharmaconfiance.shop/# Pharma Confiance
https://medicijnpunt.shop/# Medicijn Punt
PharmaJetzt Pharma Jetzt PharmaJetzt
PharmaConnectUSA: PharmaConnectUSA – buy viagra online us pharmacy
https://pharmaconfiance.shop/# pharmacie de g
Pharma Jetzt apotheke auf rechnung Pharma Jetzt
allergy: indian trail pharmacy – PharmaConnectUSA
https://medicijnpunt.shop/# online apotheek 24
internet apotheke versandkostenfrei lavita login bad apotheke online
https://pharmaconfiance.shop/# Pharma Confiance
Pharma Connect USA: PharmaConnectUSA – PharmaConnectUSA
Pharma Confiance ghd lyon cariban prix france
https://pharmaconnectusa.com/# Pharma Connect USA
shop apotheken Pharma Jetzt Pharma Jetzt
https://medicijnpunt.com/# MedicijnPunt
https://pharmaconfiance.shop/# Pharma Confiance
online apotheke versandkostenfrei: gГјnstige arzneimittel – PharmaJetzt
Medicijn Punt Medicijn Punt pharmacy online
http://pharmaconfiance.com/# monuril et grossesse
Pharma Confiance: nouveau traitement helicobacter pylori 2023 – Pharma Confiance
mediherz versandapotheke online shop medikamente corona apotheke PharmaJetzt
https://pharmajetzt.shop/# Pharma Jetzt
https://pharmaconfiance.com/# Pharma Confiance
giant food store pharmacy hours: online pharmacy in usa – PharmaConnectUSA
PharmaConnectUSA PharmaConnectUSA Super ED Trial Pack
http://pharmaconnectusa.com/# PharmaConnectUSA
PharmaConnectUSA: online pharmacy worldwide shipping – princeton u store pharmacy
Pharma Connect USA best value pharmacy viagra in tesco pharmacy
https://medicijnpunt.shop/# internetapotheek nederland
pzn suche: deutsche apotheke – apotheke rechnung
MedicijnPunt MedicijnPunt Medicijn Punt
https://medicijnpunt.com/# internet apotheek nederland
PharmaJetzt: Pharma Jetzt – Pharma Jetzt
https://pharmaconnectusa.com/# overseas pharmacy no prescription
online apotheek – gratis verzending: Medicijn Punt – Medicijn Punt
http://pharmaconnectusa.com/# Pharma Connect USA
Pharma Jetzt PharmaJetzt kapsel apotheke
shop apotheke meine bestellungen: PharmaJetzt – apotehke
https://pharmaconnectusa.com/# over the counter online pharmacy
advair pharmacy coupon: effexor pharmacy assistance – PharmaConnectUSA
Pharma Connect USA PharmaConnectUSA generic viagra pharmacy online
online pharmacy florida: unicare pharmacy vardenafil – Pharma Connect USA
https://medicijnpunt.com/# Medicijn Punt
Pharma Jetzt: Pharma Jetzt – oneline apotheke
Pharma Connect USA Pharma Connect USA florida board of pharmacy
pommade fucidine sans ordonnance: listerine bleu – nouveau traitement du dysfonctionnement Г©rectil 2022
http://pharmajetzt.com/# PharmaJetzt
http://pharmaconfiance.com/# meilleur viagra
PharmaConnectUSA PharmaConnectUSA cheap online pharmacy
MedicijnPunt: Medicijn Punt – Medicijn Punt
https://pharmajetzt.com/# PharmaJetzt
MedicijnPunt: medicaties – apotheke online
recepta online Medicijn Punt MedicijnPunt
https://pharmajetzt.shop/# Pharma Jetzt
http://pharmaconfiance.com/# Pharma Confiance
Pharma Connect USA: Pharma Connect USA – viagra online pharmacy europe
Pharma Confiance Pharma Confiance quelle pharmacie
https://pharmajetzt.com/# PharmaJetzt
Pharma Confiance: atida | santГ©discount – quel est le prix du tadalafil en pharmacie ?
https://pharmaconnectusa.shop/# Pharma Connect USA
https://medicijnpunt.shop/# beste online apotheek
distribution de la fiГЁvre Pharma Confiance Pharma Confiance
online pharmacy motilium: Pharma Connect USA – PharmaConnectUSA
https://pharmaconfiance.shop/# Pharma Confiance
Pharma Jetzt: PharmaJetzt – apotheke online deutschland
Pharma Confiance livraison medicament toulouse Pharma Confiance
http://pharmaconfiance.com/# pharmacie de la place
Pharma Connect USA: Pharma Connect USA – mebendazole boots pharmacy
https://pharmajetzt.shop/# onlineapothele
indian pharmacies safe reputable indian pharmacies IndiMeds Direct
IndiMeds Direct: IndiMeds Direct – india pharmacy
http://tijuanameds.com/# TijuanaMeds
http://indimedsdirect.com/# best india pharmacy
TijuanaMeds TijuanaMeds reputable mexican pharmacies online
https://tijuanameds.shop/# purple pharmacy mexico price list
mexican drugstore online: pharmacies in mexico that ship to usa – TijuanaMeds
best rated canadian pharmacy CanRx Direct cheapest pharmacy canada
https://tijuanameds.shop/# buying from online mexican pharmacy
https://canrxdirect.shop/# canadian drugs pharmacy
medication from mexico pharmacy medicine in mexico pharmacies buying prescription drugs in mexico
http://tijuanameds.com/# buying prescription drugs in mexico
mexico drug stores pharmacies TijuanaMeds TijuanaMeds
http://canrxdirect.com/# canadian pharmacy phone number
medication canadian pharmacy CanRx Direct reliable canadian pharmacy
https://tijuanameds.com/# reputable mexican pharmacies online
https://tijuanameds.com/# TijuanaMeds
onlinecanadianpharmacy: CanRx Direct – safe canadian pharmacy
india pharmacy indian pharmacy paypal Online medicine order
https://canrxdirect.com/# ed meds online canada
buy medicines online in india: IndiMeds Direct – IndiMeds Direct
IndiMeds Direct top 10 pharmacies in india IndiMeds Direct
https://canrxdirect.shop/# my canadian pharmacy rx
http://enclomiphenebestprice.com/# enclomiphene citrate
kroger pharmacy gabapentin: atlantic pharmacy cialis – RxFree Meds
enclomiphene citrate buy enclomiphene online enclomiphene citrate
http://enclomiphenebestprice.com/# enclomiphene
RxFree Meds: RxFree Meds – RxFree Meds
http://farmaciaasequible.com/# Farmacia Asequible
http://rxfreemeds.com/# viagra indian pharmacy
RxFree Meds best generic viagra pharmacy RxFree Meds
licoforte 40 opiniones: farmacias con envГo gratis sin pedido mГnimo – Farmacia Asequible
farmacia ml kit farmacia a casa
http://enclomiphenebestprice.com/# enclomiphene online
farmacia 24h murcia: Farmacia Asequible – Farmacia Asequible
https://farmaciaasequible.shop/# iraltone contraindicaciones
RxFree Meds pharmacy online store RxFree Meds
Farmacia Asequible: Farmacia Asequible – Farmacia Asequible
enclomiphene for men enclomiphene best price enclomiphene buy
http://farmaciaasequible.com/# Farmacia Asequible
Farmacia Asequible: Farmacia Asequible – Farmacia Asequible
https://farmaciaasequible.shop/# Farmacia Asequible
pharma tienda online Farmacia Asequible Farmacia Asequible
https://enclomiphenebestprice.com/# enclomiphene for sale
enclomiphene buy: enclomiphene testosterone – enclomiphene for sale
la roche posay opiniones comprar semaglutida online farmacias abiertas hoy en vigo